How to Teach Cursive Writing to Kindergarten.
Cursive Writing does more than look good on paper, its trains hand eye coordination, visual learning and even stimulates other areas of the brain. Here is our guide on how to teach students to quickly and effectively cursive writing.
The teaching of cursive writing follows a set of steps that help students learn and master each skill before moving on. Practicing letter strokes, writing single letters, concentrating on lower case before upper case and then practicing words for a scaffolded program for children to learn quickly and effectively.
We will break this down into those steps below. There is a great deal of debate about the relevance of cursive writing in todays digital age, and equally as much debate in the steps to take. below is a common order and outline of how the teaching of cursive writing progresses, but it you are looking for teacher tips on how to implement these we cover this after the framework, you can click here to jump to that section.
-

-
 Product on sale
How to Teach Your Children Cursive Handwriting.
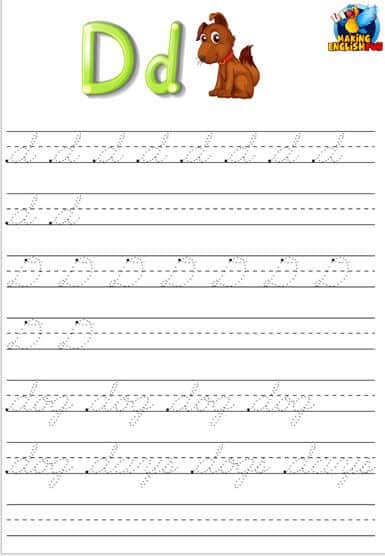
1) Learn the letter strokes first.
This doesn’t have to be weeks of practicing before forming words or letters but some time at the beginning using strokes that appear in similar letters ill give children confidence later on when they come to both write and connect letters. Although we said not to do for to long, don’t rush your students, allow them to build up skills and confidence before moving on.
2) One letter at a time.
and make them lower case!, these are much more frequently used in writing. There is debate about the order that these should be introduced. one school of thought suggests letter that are similar to their non cursive form and the other school suggests those that have similar stokes in them to build familiarity with them. Which ever way you wish to proceed they both agree that keeping the least frequent and the most difficult to the end is a good idea. We have ordered these in the most commonly used order.
Lower case cursive teaching order
| First Letter Group | c o a d g q |
| Second Letter Group | i u w t r s j p |
| Third Letter Grouping | e l b f h k |
| Fourth Letter grouping | n m v y x z |
courtesy of Suryascursive
3) Now the Upper case
After your children have developed skills with the lower case letters then move onto the Upper case versions. There is again a suggested order for these as some take quite a lot of practice and effort.
Upper Case Cursive Teaching Order
| First Letter Group | C O Q E L G |
| Second Letter Group | A M N S T F I |
| Third Letter Grouping | J P R B H K D |
| Fourth Letter grouping | U V W X Y Z |
courtesy of Suryascursive
4) Simple words practice
Some say moving on to sentences is the next logical step, however we feel it is quite a jump and some practice on repeated words and words that contain similar letters is a useful bridge before introducing sentences. If you do want to progress to sentence then rhyming ones is a useful way as it ticks both boxes. In our workbook we encourage the use of similar letters and practice the connecting strokes before this step though.

5) Move to simple sentences
As we highlighted above, after practicing connecting words student can progress onto similar sentences, again we suggest rhyming sentences and we have examples in our workbook to practice. This ensures they are learning a skill then immediately putting it into practice in a levelled and structured way.
6) Larger writing tasks
One sentences are looking clean and tidy, and your students have clearly developed their knowledge and skills. then setting both traceable and then free writing texts gives them chance to practice more and to tackle unknown words.
The above steps are the how to and what order guide, it doesn’t cover the teacher or parental advice you may need to make sure those steps are completed correctly. We cover that below.

Teacher Tips to Teach Cursive
- What Order to Teach Cursive writing
The tables above are not created at random, they are grouped together for a very specific reason. There are letters in cursive writing that are written in a very similar way, start points, flow, end points etc. These are presented in this order to help children practice a similar skill, but to be aware that the skill can be applied to different letters. Our workbook follows this order, although in the spirit of transparency there is certainly debate over which order is the best!
- Demonstrate Cursive Writing to your Students
Children’s are not going to be able to just write this way, the tracing and free writing pages in all workbooks will give them a start. However nothing replaces having a teacher or parent sit down and give them examples. Teachers will do this with the class and may use apps or a white board. If you are a parent you can just use A4 paper and write them bigger on there. It is of use to start off big, the idea is to work towards nice regular size writing. Going large at the beginning is not a problem its a strategy. You can play games by writing a letter in the air and having your students guess, and then they do the same. We do all these techniques with learning print letters and even in phonics instruction. So carry them on into this cursive writing as well.
- Develop Cursive Writing Skills
In phonics we try to get students blending single sounds into words as quickly as they can. This adds meaning to their learning and they can see real world use for the skills they are learning. Try to do the same with writing. Once students have learnt a group of letters, then have them make their own words from these and write them as cursive. They can even try to make it a competition and see how many words they can think of in 5 or 10 minutes. While they play, they practice connecting and writing these letters into words. We have a page or two of words and sentences into the workbook. Here they can practice after each letter group. We also have blank pages to print out and have them try on their own.
- Take your time – Cursive writing Practice
Children learn at different speeds and have different motivations. It is important to practice but there is no rush. The parallels with phonics are similar here as well. A little and often approach will work better than hours and hours. Just be sure that there is regular practice and its not done to infrequently. As with every skill students will need to repeat it till its learnt.
- Cursive Writing Resources
It is a good idea, especially for young learners, to use pencils, and softer lead pencils. They move across the paper easier and make the letters and words flow more effectively. With regards to what type of paper. It is useful to have the dotted type for practice to help children get familiar with the size of upper and lower case letters. As a top tip to know which of your students (or children) are left or right handed as this will help. It means you know at what angle and direction the paper should be. Either way don’t force the paper to be 90 degrees to the student as it is MUCH better to be angled. Right handed to the right and left handed to the left.
- Be Aware of How Children hold the Pen or Pencil
Make sure that your children are holding the pencil properly. It is difficult to write any type of letters never mind connected cursive writing if students have not been taught to properly grip a pen or pencil. The link above offers tips and advice if you are working with younger students who need some guidance.
- Resources for Cursive Writing
There are selections, including our own, all over the internet. the paid ones often have more effort put in, but if you need free hand practice you find the dotted lines to download and print. It may be just as cheap to buy a notepad like this from your local stationary store as well. We have blank printable pages at the end of our cursive workbook to help with this.
If would be useful to pick up a whiteboard to all you and your children or students to write larger letters before moving on to smaller ones. Amazon has a pretty decent one here with magnetic pens (I always lose mine)
- Ask the School What They are Doing with Cursive Writing.
This goes for more than just cursive writing, phonics and reading skills are much better retained if parents and teachers work together to help their students and children. Don’t be afraid to ask teachers for help, they will always be willing to share. Especially make sure they are using the same, or similar cursive alphabet as you so as not to confuse your children. ( there are many many styles). They can adapt to their own style and preference later.
Why Teach Cursive Writing?
Although we have a larger article on here on the reasons behind teaching cursive to students we will give you the abridged bulleted version in case you are pulling your hair out and wonder why we just don’t teach typing. (We should do that as well by the way!)
Cursive writing is a fine motor skill and is great brain training for young learners, worth on intricate tasks helps young children develop the skills required for all sort of every day tasks. Tying shoes, pulling up zips, doing up buttons, and more.
Studies have shown that learning cursive can help students write more effectively and fluidly. It also is a faster way to write and allows students to write more in a shorter time. ( in my exam based culture that is helpful). According to Montessori and psychology today
Students “wrote more words, faster, and expressed more ideas when writing essays by hand versus with a keyboard.” This study included second, fourth, and sixth graders
Psychology Today
Although we are in a digital world and we communicate with text, image and even emoji there is still a place for cursive. It is still consider a better way to take notes and write letters. It is a more personal and treasured way of communicating. Even if its rarer, it should still come in handy when trying to read your doctors handwriting!
Although it may seem like a minor issue as you sit next to your 7 year old, one day they are going to be signing cheques, purchase agreements and even wedding registers. Cursive is the early stages of getting them ready to develop their own signature!
It is also a reminder of our past, and although this may seem a lesser reason, we feel that pausing and remembering how we came to be where we are in todays fast paced technological world is something to be treasured. We are not alone in thinking this.
Happy writing

Hi I’m Marc. A teacher of over 15 years, mostly English but dabbled in outdoor pursuits and media. Thought is was about time to sharing both what I have learnt during that time and the resources I have put together. On this site we aim to teach the theory and share our thoughts, but also go that one step further and give you access to the hard resources you need for your class or for you children. Feel free to take a look at our resources, email us on info@makingenglishfuncom.wpcomstaging.com, or jump on the Facebook group to ask questions. Happy learning, teaching or playing!
Making English Fun!
I have been a teacher of English for over 15 years, in that time i made hundreds and thousands of resources and learnt so much i think its worth sharing. Hopefully to help teachers and parents around the world.


2 Comments